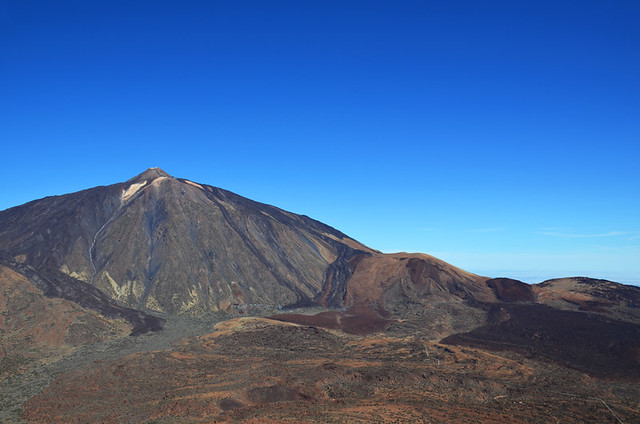
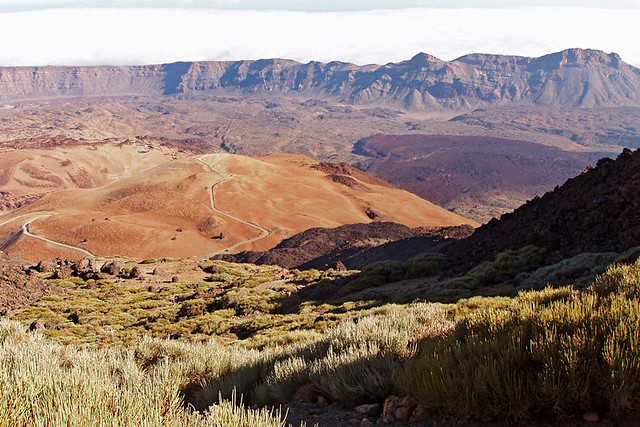
It is quite simply the ultimate walking route on Tenerife, and possibly all of the Canary Islands. To hike to the summit of the highest Spanish mountain, Mount Teide, is quite an achievement to have on your hiking CV.

Around this time of year there can be lots of questions about logistics as well as the practicalities of tackling the route. In some ways walking is no different than eating a meal in a restaurant – you can have two people eating the exact same meal but how they view the experience can vary wildly. Similarly you can have two hikers walking the same route but, depending on experience/fitness levels/age/what individuals want from a walking route etc., they rate and recount the experience differently. Subsequently there can be conflicting advice about the likes of climbing Mount Teide dished out online, especially when, as is often the case, advice is dished out by some people who haven’t actually done it.
We have, and we’ve also walked extensively across Europe and can compare appropriate aspects of the route to equivalent length ascents in other walking destinations. So, to help anyone interested attempting the ascent of Spain’s highest mountain, here are ten snippets of information regarding climbing Mount Teide.

What is the route to climb Mount Teide?
The classic walking trail to the top of Mount Teide is the Montaña Blanca route, this is the one most people take. But there is another official route to the top of Mount Teide. The alternative climbs via Pico Viejo (there are a couple of potential start points – Roques de Garcia being one). Both are around similar distances (just over 10km) and with similar ascents involved, although the Pico Viejo route adds on a couple of hundred metres. How long it takes to climb each depends on the individual, but the Canarian Government website advises five and a half hours for the Montaña Blanca route and eight hours for the Pico Viejo trail.

The starting point
If driving to Teide to climb from Montaña Blanca, the first challenge can be finding somewhere to park. There is a car park at the start of the route, but it’s tiny. You’ll often see cars parked in precarious positions at the side of the road all around the Montaña Blanca car park.

Mount Teide by cable car
There is the option of letting the cable car do most of the hard work. The journey from the lower station on the crater floor (2356m) to the upper station at 3,555m takes around eight minutes and costs €27 per adult (non-resident rate). It’s the most popular way to get close to the summit, and you’ll read plenty of accounts of people who claim to have climbed the mountain who have actually only taken the cable car. But although it’s an out of this world experience in itself, it’s nothing like climbing from the base of Teide.

A permit is required, but…
A permit is required to climb from the upper cable car station to the summit. These can be booked online in advance (do this well in advance as places are limited and it’s a popular hike). There are four time slots a day (9-11am, 11am-1pm, 1-3pm, and 3-5pm). Although only a short distance, the altitude can make the going slow, especially of you’ve walked all the way. Hikers who choose to stay overnight at the Altavista Refuge in order to watch sunset from the summit don’t need a permit as the ‘guard’ doesn’t take up position until the first cable car arrives at around 9am.

Think about the time of year
A huge mistake people make relating to many things on Tenerife is not to realise the experience they have of the island at one time of the year won’t be the same somebody else will have during a different season. Some warn about the dangers of the cable car not running due to high winds, or the routes being closed because of ice and snow. This is always going to happen at various times during the year, but not at others. And there are key periods when it’s more likely to happen – during change of seasons such as the end of October into November and February/March. We were asked to check out walking routes in Teide National Park in March, but I pushed the dates back to the beginning of April because we know the weather patterns, which can be very predictable up to a point. Sure enough, the last week of March saw snow and high winds. By the following week the weather was perfect for walking. However, it can still be a lottery.

Temperatures
It’s always substantially cooler the higher up Teide you climb but, again, the variations in temperature depend on when you climb. For example, the temperature on the crater floor at the beginning of September can be around 18C and 7C on the summit. In November it’s around 5C in the crater and -6C after dark on the summit. By February those can have dropped to 1C and as low as -20C on the summit (with the wind-chill factor). It is far colder climbing to the summit when it’s still dark in order to watch sunrise (the water in our packs froze solid) but it is worth it.

How difficult is it?
How long is a piece of string? Canarian Government advice classes both hiking routes as ‘high difficulty’ and we’d agree. For a start, walkers have to ascend around 1400m over 10km with some sections having a gradient of 60%. That’s no stroll in the park. You don’t need crampons and the path is usually well defined, but it’s hard going. The volcanic picón can add a slippery element but the biggest energy sapper can be the effects of walking at altitude.

Consider the effects of altitude
Altitude sickness can kick in around 2400m, just about the point the routes start and before they get steep. Not everyone suffers badly, it’s one of those things you won’t know till you walk at these sort of levels, but everyone will feel it in one way or another. The thin air makes the going more difficult. You might feel fine, but your limbs just refuse to work. Taking it slow and easy, allowing time to acclimatise, is the key.

Footwear and hiking gear
Layers are essential. Folk talk about how it’s always cool on Teide, and technically it is. However, when you’re exerting energy and the sun’s beating down from a cloudless sky (often the case) it feels hot. When the sun drops, so does the temperature. Specialist climbing gear is not required. Decent walking boots with ankle support are sufficient.

Getting down again
Climbing 1400m is one thing, descending is another. Apart from impact on knees (harder the older you get), the scree can make it a slippery business in parts. We walked up and done again once… never again. Getting to the summit is the achievement. Taking the cable car back is a reward, even if it does mean a trek back to wherever the car is parked.
Mount Teide and other Teide National Park hiking routes are included in our Real Tenerife Island Walks – all walks set as well as in both the Northern Routes and Southern Routes packages. Click here for more information.


Me and my boyfriend are considering doing the hike up mount Teide. We are in good shape (I do crossfit and he runs and lifts weights), however we do not have experience with hiking in the mountains and we think it is difficult to get a sense of if we would be able to do it. We would really like to do it and challenge ourselfs, but we are unsure if it is a bad idea. Do you think that unexperienced hikers in good shape would be able to do it?
Hi Cecilie, many apologies for the late response, for some reason your comment just slipped below the radar – sorry! I’m hoping I won’t be too late with this but here goes anyway… The issue with climbing Mount Teide is not so much having experience of hiking in mountains (generally speaking, the route is navigable) but rather the effects of the altitude which will rob you of your energy regardless of how fit you are. I would recommend spending some time in the crater first, perhaps doing one or two hikes at that level and getting acclimatised before taking on the challenge of Teide itself. Second piece of advice would be, when you start the climb, TAKE IT SLOW, I mean, really easy, at a pace that feels like you could walk all day. The higher you climb, the more you’ll feel the lack of oxygen so give yourself plenty of daylight hours in which to comfortably reach the summit. If you feel unwell, give it up and head back down to a lower level.